Clonezilla 3 0 1 64 bit
Author: m | 2025-04-24
Clonezilla 2.6.5 (32-bit) Date released: (3 years ago) 1; 2. Screenshots. Related Downloads. Clonezilla 3.1.0 (32-bit) Clonezilla 3.1.0 (64-bit) Top Clonezilla 2.6.7 (64-bit) Fecha Publicado: 07 jul. 2025 (hace 3 a os) Descargar. Clonezilla 2.6.6 (64-bit) Fecha Publicado: 06 may. 2025 (hace 3 a os) Descargar. Clonezilla 2.6.5 (64-bit)
Hamachi 1 0 3 0 64 bit download - X 64-bit Download
Tải xuống FileZilla cho Linux 3.55.0 (64-bit)Nhấn vào đây nếu trang web tải về chưa khởi chạy. Liên kết tải xuống FileZilla cho Linux 3.55.0 (64-bit) được mở ở trang web bên ngoài.Xem thêm các liên kết tải xuống khác dưới đây.Báo không tải đượcFileZilla for Linux 3.55.0 là phần mềm quản lý nguồn dữ liệu FTP trên nền tảng Linux. Nó thực sự hữu ích cho cả việc upload và download dữ liệu trao đổi qua FTP. Clonezilla LiveCD (64-bit) for Linux Clonezilla là công cụ sao lưu ổ cứng tương tự như Norton Ghost, nhưng là mã nguồn mở, miễn phí và tốt. Xếp hạng: 3 1 Phiếu bầuSử dụng: Miễn phí 669 Tải về FileZilla cho Linux Phần mềm tải dữ liệu lên server nhanh chóng FileZilla for Linux 3.55.0 là phần mềm quản lý nguồn dữ liệu FTP trên nền tảng Linux. Nó thực sự hữu ích cho cả việc upload và download dữ liệu trao đổi qua FTP. Xếp hạng: 3 1 Phiếu bầuSử dụng: Miễn phí 845 Tải về Pogoplug for Linux Với Pogoplug, bạn không cần phải đem theo lỉnh kỉnh các ổ cứng USB trong người, chỉ cần để chúng tại nhà hoặc văn phòng, cắm tất cả vào máy Pogoplug Xếp hạng: 3 1 Phiếu bầuSử dụng: Dùng thử 199 Tải về Clonezilla LiveCD (32-bit) for Linux Clonezilla là công cụ sao lưu ổ cứng tương tự như Norton Ghost, nhưng là mã nguồn mở, miễn phí và tốt. Xếp hạng: 3 1 Phiếu bầuSử dụng: Miễn phí 618 Tải về Flick for Linux Phần mềm chuyển dữ liệu không dây cho Linux Flick for Linux cung cấp cho người dùng Linux một công cụ chia sẻ dữ liệu tiện ích, thông minh, đa nền tảng và hoàn toàn miễn phí. Xếp hạng: 3 1 Phiếu bầuSử dụng: Miễn phí 103 Tải về ; Xem thêm Dữ liệu - File
Download priprinter -64-bit- 3 1 0 992 - Download.com.vn
When you need to create an image of your computer, you usually have to store the image somewhere. Where did you leave that boot cd with your favorite image software and where to store the image? Store on NAS device, external USB device or DVD? You can use one device for both! This article describes how you can configure a USB device with 2 partitions where the first partition will contain the image software and the 2nd partition will be used for storing the images. That way you only need 1 (USB) device for creating and storing image(s) of your computer(s). I’ll be using the free Clonezilla imaging software. Setup is done from a (live) Linux environment. The first partition on the USB device can be recognized by Windows (FAT), the 2nd partition only by Linux and Clonezilla (EXT2/3). From (live) linux environment, create an empty USB device When running VMware, you may have to connect your USB device through Virtual Machine, Removable Devices, , Connect. Determine your device ID using the ‘dmesg’ command, its output will look like this: [62249.491845] sdb: [62249.532482] sd 3:0:0:0: [sdb] No Caching mode page present [62249.532490] sd 3:0:0:0: [sdb] Assuming drive cache: write through [62249.532575] sd 3:0:0:0: [[b]sdb[/b]] Attached SCSI removable disk Open in new window Device ID is sdb in this case. When your USB device contains data your Linux environment may mount the device automatically, in that case, using the ‘mount’ command, find out where it is mounted: /dev/sdb on /media/42D3-B580 type vfat (rw,nosuid,nodev,uid=1000,gid=1000,shortname=mixed,dmask=0077,utf8=1,showexec,flush,uhelper=udisks) Open in new window It is mounted on /media/42D3-B580 in this case. Unmount it using the ‘umount’ command, like this: umount /media/42D3-B580 Open in new window Checking with ‘mount’ will show you that the USB device is not mounted anymore. As ‘root’ delete any existing partitions using the fdisk /dev/, d command, like this: fdisk /dev/sdb Command (m for help): d Partition number (1-4): 2 Open in new window Repeat until all partitions are deleted: Command (m for help): d Selected partition 4 Command (m for help): p Disk /dev/sdb: 16.0 GB, 16039018496 bytes 64 heads, 32 sectors/track, 15296 cylinders, total 31326208 sectors Units = sectors of 1 * 512 = 512 bytes Sector size (logical/physical): 512 bytes / 512 bytes I/O size (minimum/optimal): 512 bytes / 512 bytes Device Boot Start End Blocks Id System Command (m for help): Open in new window Write changes to yourClonezilla 64-bit download - X 64-bit Download
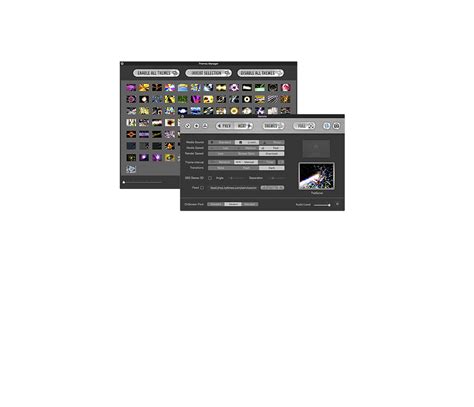
Partition table. Syncing disks. vmmint01 etc # Open in new window -> You now have 2 partitions on your USB device (without file systems). Create file systems:vmmint01 etc # mkfs.vfat /dev/sdb1 mkfs.vfat 3.0.9 (31 Jan 2010) vmmint01 etc # vmmint01 etc # mkfs.ext3 /dev/sdb2 mke2fs 1.41.14 (22-Dec-2010) Filesystem label= OS type: Linux Block size=4096 (log=2) Fragment size=4096 (log=2) Stride=0 blocks, Stripe width=0 blocks 934720 inodes, 3736320 blocks 186816 blocks (5.00%) reserved for the super user First data block=0 Maximum filesystem blocks=3829399552 115 block groups 32768 blocks per group, 32768 fragments per group 8128 inodes per group Superblock backups stored on blocks: 32768, 98304, 163840, 229376, 294912, 819200, 884736, 1605632, 2654208 Writing inode tables: done Creating journal (32768 blocks): done Writing superblocks and filesystem accounting information: done This filesystem will be automatically checked every 31 mounts or 180 days, whichever comes first. Use tune2fs -c or -i to override. vmmint01 etc # Open in new window Creating the 2nd partition can take some time, please be patient. Note: Windows will only recognize 1 partition on a USB device so it will only see the first 700Mb. -> You now have 2 partitions on your USB device with file systems. Unplug and plug in your USB device and most Linux systems will automount your 2 devices. Install live recovery tooling like Clonezilla on 1st partition, bootable This is how you can install Clonezilla onto the 1st partition of your USB device. I use unetbootin, both available for Linux and Windows. See: and: Get Clonezilla live .iso from here: Get/install unetbootin (see here), then start unetbootin and select ‘DiskImage’ where you browse ‘...’ to the Clonezilla .iso image file, at ‘Type’ select ‘USB Drive’ and the important choice is at ‘Drive’ where you select /dev/sdb1 and press ‘OK’. Note: unetbootin will only ‘see’ the /dev/sdb1 and /dev/sdb2 devices when they are mounted. unetbootin may give an ‘overwrite’ warning -> acknowledge that. When finished, press ‘OK’, or ‘Reboot’ if you want to reboot now. You have to set the BIOS of your computer to boot from USB. When unetbootin has finished, you are ready to make your first image/backup, just reboot with your USB device. -> You now have a bootable USB device with Clonezilla live on the first partition and available data storage on the 2nd partition. Clonezilla manual: for reading this article. If you find it useful, you can click 'Good Article'. Clonezilla 2.6.5 (32-bit) Date released: (3 years ago) 1; 2. Screenshots. Related Downloads. Clonezilla 3.1.0 (32-bit) Clonezilla 3.1.0 (64-bit) TopClonezilla - X 64-bit Download
OpponentEloDiffResultsScoreLOSPerf– Stockfish 15 64-bit 4CPU3622+13−13(+164)6.5 − 13.5(+0−7=13)32.5%6.5 / 200.0%+53– Stockfish 14 64-bit 4CPU3621+13−13(+163)5.5 − 14.5(+0−9=11)27.5%5.5 / 200.0%+14– Dragon by Komodo 3.1 64-bit 4CPU3616+14−14(+158)5 − 15(+0−10=10)25.0%5.0 / 200.0%−8– Fat Fritz 2 64-bit 4CPU3601+10−10(+143)6.5 − 13.5(+0−7=13)32.5%6.5 / 200.0%+32– Berserk 10 64-bit 4CPU3567+13−13(+109)6 − 14(+0−8=12)30.0%6.0 / 200.0%−18– Revenge 3.0 64-bit 4CPU3558+9−9(+100)6.5 − 13.5(+1−8=11)32.5%6.5 / 200.0%−15– Ethereal 13.75 64-bit 4CPU3554+12−12(+96)6.5 − 13.5(+0−7=13)32.5%6.5 / 200.0%−14– Koivisto 8.0 64-bit 4CPU3551+11−11(+93)7 − 13(+0−6=14)35.0%7.0 / 200.0%−2– SlowChess Blitz 2.9 64-bit 4CPU3545+9−9(+87)8.5 − 11.5(+0−3=17)42.5%8.5 / 200.0%+41– Clover 5.0 64-bit 4CPU3544+17−17(+86)12 − 20(+0−8=24)37.5%12.0 / 320.0%+9– Deep Sjeng 3.6 a16 64-bit 4CPU3544+16−16(+86)12 − 20(+0−8=24)37.5%12.0 / 320.0%+9– RubiChess 20220813 64-bit 4CPU3530+15−15(+72)7 − 13(+0−6=14)35.0%7.0 / 200.0%−20– rofChade 3.0 64-bit 4CPU3526+10−10(+68)7 − 13(+0−6=14)35.0%7.0 / 200.0%−24– Clover 4.0 64-bit 4CPU3525+16−16(+67)11 − 19(+0−8=22)36.7%11.0 / 300.0%−16– Minic 3.32 64-bit 4CPU3520+14−14(+62)8.5 − 15.5(+0−7=17)35.4%8.5 / 240.0%−28– Minic 3.30 64-bit 4CPU3515+14−14(+57)6.5 − 13.5(+0−7=13)32.5%6.5 / 200.0%−52– Caissa 1.8 64-bit 4CPU3513+17−17(+55)11 − 15(+0−4=22)42.3%11.0 / 260.0%+8– Seer 2.5.0 64-bit 4CPU3510+13−13(+52)9.5 − 10.5(+1−2=17)47.5%9.5 / 200.0%+38– Carp 3.0.0 64-bit 4CPU3501+16−16(+43)10.5 − 11.5(+0−1=21)47.7%10.5 / 220.0%+29– Arasan 23.4 64-bit 4CPU3499+13−13(+41)8.5 − 11.5(+0−3=17)42.5%8.5 / 200.0%−4– Uralochka 3.38c 64-bit 4CPU3493+15−15(+35)10 − 10(+2−2=16)50.0%10.0 / 200.0%+35– Rebel 15.1a 64-bit 4CPU3490+16−16(+32)9 − 11(+0−2=18)45.0%9.0 / 200.1%+4– Arasan 23.5 64-bit 4CPU3488+15−15(+30)10.5 − 11.5(+1−2=19)47.7%10.5 / 220.2%+17– Igel 3.1.0 64-bit 4CPU3484+12−12(+26)9.5 − 10.5(+0−1=19)47.5%9.5 / 200.3%+13– Black Marlin 7.0 64-bit 4CPU3466+14−14(+8)8.5 − 11.5(+1−4=15)42.5%8.5 / 2018.7%−41– Houdini 6 64-bit 4CPU3456+7−7(−2)9 − 11(+1−3=16)45.0%9.0 / 2060.1%−31– Velvet 5.1.0 64-bit 4CPU3454+17−17(−4)16.5 − 13.5(+7−4=19)55.0%16.5 / 3063.2%+29– Marvin 6.1.0 64-bit 4CPU3448+15−15(−10)11.5 − 12.5(+0−1=23)47.9%11.5 / 2482.7%−20– Wasp 6.00 64-bit 4CPU3440+15−15(−18)12.5 − 7.5(+5−0=15)62.5%12.5 / 2096.4%+55– Nemorino 6.05 64-bit 4CPU3432+16−16(−26)10 − 10(+3−3=14)50.0%10.0 / 2099.2%−26– Booot 7.0 64-bit 4CPU3428+16−16(−30)10 − 10(+2−2=16)50.0%10.0 / 2099.7%−33– Velvet 4.1.0 64-bit 4CPU3423+15−15(−35)11 − 9(+4−2=14)55.0%11.0 / 20100.0%−4– Mantissa 3.7.2 64-bit 4CPU3381+15−15(−77)12 − 8(+4−0=16)60.0%12.0 / 20100.0%−17– Marvin 6.0.0 64-bit 4CPU3377+16−16(−81)11 − 9(+2−0=18)55.0%11.0 / 20100.0%−53– Expositor 2BR17 64-bit 4CPU3376+16−16(−82)12.5 − 7.5(+6−1=13)62.5%12.5 / 20100.0%0– Counter 5.0 64-bit 4CPU3373+18−18(−85)14.5 − 9.5(+7−2=15)60.4%14.5 / 24100.0%−17– Smallbrain 6.0 64-bit 4CPU3370+16−16(−88)13.5 − 10.5(+3−0=21)56.3%13.5 / 24100.0%−52– Stash 34.0 64-bit 4CPU3364+18−18(−94)16.5 − 7.5(+10−1=13)68.8%16.5 / 24100.0%+28– Drofa 4.0.0 64-bit 4CPU3318+20−20(−140)15 − 3(+12−0=6)83.3%15.0 / 18100.0%+102– Winter 1.0 64-bit 4CPU3306+18−18(−152)12.5 − 3.5(+9−0=7)78.1%12.5 / 16100.0%+40– Drofa 3.3.22 64-bit 4CPU3300+21−21(−158)13.5 − 6.5(+7−0=13)67.5%13.5 / 20100.0%−47Clonezilla 3.0.2 (64-bit) - FileHorse
And click Start Clone.Tips: If there are bad sectors on the source disk, it is advised to uncheck Sector by sector clone box since it will clone every sector including bad sectors to the target disk. If the target disk is an SSD, check SSD Alignment to improve the speed of reading and writing as well as prolong the service life of SSD. If you are cloning a smaller disk to a larger disk, click Edit Partitions to make full use of disk capacity. Another way to transfer Windows 10/11 to new hard driveAs mentioned above, AOMEI Backup is also specialized backup and restore software. Therefore, you can transfer OS to a new drive by creating system image backup and then restoring system image to the new drive.💛 Extra tip:If you want to mount system/disk/partition backup image to restore individual files, you can go to Tools > Explore Image.Bonus: Limitations of cloning Windows 10/11 with ClonezillaThere are some limitations you should know about Clonezilla clone Windows 10/11. As you can see, the whole Clonezilla disk to disk clone process needs lots of steps, which is complicated and time-consuming. And you may be confused about the operation. If you want to use Clonezilla to clone Windows 10/11 to smaller SSD, shrinking the source partition is required to fit the destination partition. There is a chance that Clonezilla failed to clone when there is a bad sector on the drive. Windows not booting after clone due to different reasons, such as missing system reserved partition or EFI system partition, BIOS or UEFI boot mode dismatch, etc. Unable to mount Clonezilla image to restore a single file. It does not have a user-friendly GUI. If you prefer an easier way to clone Windows 10/11 to SSD/HDD instead of using Clonezilla, you have to turn to other cloning software for help. Fortunately, the above-mentioned Clonezilla alternative can help you clone Windows 10/11 to new hard drive in simple steps, even to a smaller SSD.FAQs about Clonezilla Windows 10/111. Does Clonezilla work on Windows 10/11?Clonezilla works on Windows 10/11, and you can use Clonezilla to clone Windows 10/11 and other systems to new hard drive or SSD, including the current installation, settings, apps, and personal data, etc.2. Does Clonezilla copy the operating system?As mentioned earlier, Clonezilla is free and open source software, which supports both disk imaging and cloning. For cloning a disk, it will clone everything and requires the target disk is larger than or equal to the source disk.3. Does Clonezilla work with UEFI?All Clonezilla live versions only support computers with legacy BIOS. If you want to use Clonezilla on Windows 10/11 UEFI, you could use Debian-based or Ubuntu-based AMD64 (X86-64) version of Clonezilla live.ConclusionNow you know how to clone Windows 10/11 via Clonezilla and AOMEI Backupper. Obviously, AOMEI Backupper is much easier and it’s the best Clonezilla alternative because it supports you to clone disk or partition in Windows 11/10/8/7/Vista/XP as you want.Besides, it can do more than what you think toClonezilla 3.1.0 (64-bit) - FileHorse
Happy Gecko Common Specs ARM Cortex-M0+ CPU platform25 MHzUp to 64 kB FlashUp to 8 kB RAM131 μA/MHz in Active Mode (EM0)0.9 μA sleep with RTC and RAM retentionAutonomous peripherals in sleep DMA and peripheral reflex systemUSART, I²C, SPI, and USBUp to 35 General Purpose I/O Pins-40 °C to +105 °C operation range1.98 V to 3.8 V single power supply Packages:24-pin QFN (7 mm x 7 mm)32-pin QFN (6 mm x 6 mm)36-pin QFN (5 mm x 5 mm) Select Columns Part Number MHz Flash RAM Dig I/O Pins 5 Volt Tolerant ADC 1 DAC USB Cap Sense LCD Temp Sensor Timers (16-bit) AES-128 AES-256 ECC SHA-1 SHA-2 RSA-2048 UART USART SPI I2C I2S EMIF RTC Comparators Vdd (min) Vdd (max) Package Type Package Size (mm) Internal Osc. Debug Interface Cryptography New --> EFM32HG108F64G-QFN24 Buy | --> Sample Dev Kit 25 64 8 17 — — 3 3 2 2 1 1 0 1 1.98 3.8 QFN24 5x5 ±2% MTB; SW New --> EFM32HG110F64G-QFN24 Buy | --> Sample Dev Kit 25 64 8 17 12-bit, 2-ch., 1 Msps — 3 3 2 2 1 1 0 1 1.98 3.8 QFN24 5x5 ±2% MTB; SW AES-128 New --> EFM32HG210F64G-QFN32 Buy | --> Sample Dev Kit 25 64 8 24 12-bit, 4-ch., 1 Msps — 3 3 2 2 1 1 0 1 1.98 3.8 QFN32 6x6 ±2% MTB; SW AES-128 New --> EFM32HG222F32G-QFP48 Buy | --> Sample Dev Kit 25 32 4 37 12-bit, 4-ch., 1 Msps — 3 3 2 2 1 1 0 1 1.98 3.8 QFP48 7x7 ±2% MTB; SW AES-128 New --> EFM32HG222F64G-QFP48 Buy | --> Sample Dev Kit 25 64 8 37 12-bit, 4-ch., 1 Msps — 3 3 2 2 1 1 0 1 1.98 3.8 QFP48 7x7 ±2% MTB; SW AES-128 New --> EFM32HG222F64N-QFP48 Buy | --> Dev Kit 25 64 8 37 12-bit, 4-ch., 1 Msps — 3 3 2 2 1 1 0 1 1.98 3.8 QFP48 7x7 ±2% MTB; SW AES-128 New --> EFM32HG310F64G-QFN32 Buy | --> Sample Dev Kit 25 64 8 22 12-bit, 4-ch., 1 Msps — 3 3. Clonezilla 2.6.5 (32-bit) Date released: (3 years ago) 1; 2. Screenshots. Related Downloads. Clonezilla 3.1.0 (32-bit) Clonezilla 3.1.0 (64-bit) Top Clonezilla 2.6.7 (64-bit) Fecha Publicado: 07 jul. 2025 (hace 3 a os) Descargar. Clonezilla 2.6.6 (64-bit) Fecha Publicado: 06 may. 2025 (hace 3 a os) Descargar. Clonezilla 2.6.5 (64-bit)Comments
Tải xuống FileZilla cho Linux 3.55.0 (64-bit)Nhấn vào đây nếu trang web tải về chưa khởi chạy. Liên kết tải xuống FileZilla cho Linux 3.55.0 (64-bit) được mở ở trang web bên ngoài.Xem thêm các liên kết tải xuống khác dưới đây.Báo không tải đượcFileZilla for Linux 3.55.0 là phần mềm quản lý nguồn dữ liệu FTP trên nền tảng Linux. Nó thực sự hữu ích cho cả việc upload và download dữ liệu trao đổi qua FTP. Clonezilla LiveCD (64-bit) for Linux Clonezilla là công cụ sao lưu ổ cứng tương tự như Norton Ghost, nhưng là mã nguồn mở, miễn phí và tốt. Xếp hạng: 3 1 Phiếu bầuSử dụng: Miễn phí 669 Tải về FileZilla cho Linux Phần mềm tải dữ liệu lên server nhanh chóng FileZilla for Linux 3.55.0 là phần mềm quản lý nguồn dữ liệu FTP trên nền tảng Linux. Nó thực sự hữu ích cho cả việc upload và download dữ liệu trao đổi qua FTP. Xếp hạng: 3 1 Phiếu bầuSử dụng: Miễn phí 845 Tải về Pogoplug for Linux Với Pogoplug, bạn không cần phải đem theo lỉnh kỉnh các ổ cứng USB trong người, chỉ cần để chúng tại nhà hoặc văn phòng, cắm tất cả vào máy Pogoplug Xếp hạng: 3 1 Phiếu bầuSử dụng: Dùng thử 199 Tải về Clonezilla LiveCD (32-bit) for Linux Clonezilla là công cụ sao lưu ổ cứng tương tự như Norton Ghost, nhưng là mã nguồn mở, miễn phí và tốt. Xếp hạng: 3 1 Phiếu bầuSử dụng: Miễn phí 618 Tải về Flick for Linux Phần mềm chuyển dữ liệu không dây cho Linux Flick for Linux cung cấp cho người dùng Linux một công cụ chia sẻ dữ liệu tiện ích, thông minh, đa nền tảng và hoàn toàn miễn phí. Xếp hạng: 3 1 Phiếu bầuSử dụng: Miễn phí 103 Tải về ; Xem thêm Dữ liệu - File
2025-04-15When you need to create an image of your computer, you usually have to store the image somewhere. Where did you leave that boot cd with your favorite image software and where to store the image? Store on NAS device, external USB device or DVD? You can use one device for both! This article describes how you can configure a USB device with 2 partitions where the first partition will contain the image software and the 2nd partition will be used for storing the images. That way you only need 1 (USB) device for creating and storing image(s) of your computer(s). I’ll be using the free Clonezilla imaging software. Setup is done from a (live) Linux environment. The first partition on the USB device can be recognized by Windows (FAT), the 2nd partition only by Linux and Clonezilla (EXT2/3). From (live) linux environment, create an empty USB device When running VMware, you may have to connect your USB device through Virtual Machine, Removable Devices, , Connect. Determine your device ID using the ‘dmesg’ command, its output will look like this: [62249.491845] sdb: [62249.532482] sd 3:0:0:0: [sdb] No Caching mode page present [62249.532490] sd 3:0:0:0: [sdb] Assuming drive cache: write through [62249.532575] sd 3:0:0:0: [[b]sdb[/b]] Attached SCSI removable disk Open in new window Device ID is sdb in this case. When your USB device contains data your Linux environment may mount the device automatically, in that case, using the ‘mount’ command, find out where it is mounted: /dev/sdb on /media/42D3-B580 type vfat (rw,nosuid,nodev,uid=1000,gid=1000,shortname=mixed,dmask=0077,utf8=1,showexec,flush,uhelper=udisks) Open in new window It is mounted on /media/42D3-B580 in this case. Unmount it using the ‘umount’ command, like this: umount /media/42D3-B580 Open in new window Checking with ‘mount’ will show you that the USB device is not mounted anymore. As ‘root’ delete any existing partitions using the fdisk /dev/, d command, like this: fdisk /dev/sdb Command (m for help): d Partition number (1-4): 2 Open in new window Repeat until all partitions are deleted: Command (m for help): d Selected partition 4 Command (m for help): p Disk /dev/sdb: 16.0 GB, 16039018496 bytes 64 heads, 32 sectors/track, 15296 cylinders, total 31326208 sectors Units = sectors of 1 * 512 = 512 bytes Sector size (logical/physical): 512 bytes / 512 bytes I/O size (minimum/optimal): 512 bytes / 512 bytes Device Boot Start End Blocks Id System Command (m for help): Open in new window Write changes to your
2025-04-14OpponentEloDiffResultsScoreLOSPerf– Stockfish 15 64-bit 4CPU3622+13−13(+164)6.5 − 13.5(+0−7=13)32.5%6.5 / 200.0%+53– Stockfish 14 64-bit 4CPU3621+13−13(+163)5.5 − 14.5(+0−9=11)27.5%5.5 / 200.0%+14– Dragon by Komodo 3.1 64-bit 4CPU3616+14−14(+158)5 − 15(+0−10=10)25.0%5.0 / 200.0%−8– Fat Fritz 2 64-bit 4CPU3601+10−10(+143)6.5 − 13.5(+0−7=13)32.5%6.5 / 200.0%+32– Berserk 10 64-bit 4CPU3567+13−13(+109)6 − 14(+0−8=12)30.0%6.0 / 200.0%−18– Revenge 3.0 64-bit 4CPU3558+9−9(+100)6.5 − 13.5(+1−8=11)32.5%6.5 / 200.0%−15– Ethereal 13.75 64-bit 4CPU3554+12−12(+96)6.5 − 13.5(+0−7=13)32.5%6.5 / 200.0%−14– Koivisto 8.0 64-bit 4CPU3551+11−11(+93)7 − 13(+0−6=14)35.0%7.0 / 200.0%−2– SlowChess Blitz 2.9 64-bit 4CPU3545+9−9(+87)8.5 − 11.5(+0−3=17)42.5%8.5 / 200.0%+41– Clover 5.0 64-bit 4CPU3544+17−17(+86)12 − 20(+0−8=24)37.5%12.0 / 320.0%+9– Deep Sjeng 3.6 a16 64-bit 4CPU3544+16−16(+86)12 − 20(+0−8=24)37.5%12.0 / 320.0%+9– RubiChess 20220813 64-bit 4CPU3530+15−15(+72)7 − 13(+0−6=14)35.0%7.0 / 200.0%−20– rofChade 3.0 64-bit 4CPU3526+10−10(+68)7 − 13(+0−6=14)35.0%7.0 / 200.0%−24– Clover 4.0 64-bit 4CPU3525+16−16(+67)11 − 19(+0−8=22)36.7%11.0 / 300.0%−16– Minic 3.32 64-bit 4CPU3520+14−14(+62)8.5 − 15.5(+0−7=17)35.4%8.5 / 240.0%−28– Minic 3.30 64-bit 4CPU3515+14−14(+57)6.5 − 13.5(+0−7=13)32.5%6.5 / 200.0%−52– Caissa 1.8 64-bit 4CPU3513+17−17(+55)11 − 15(+0−4=22)42.3%11.0 / 260.0%+8– Seer 2.5.0 64-bit 4CPU3510+13−13(+52)9.5 − 10.5(+1−2=17)47.5%9.5 / 200.0%+38– Carp 3.0.0 64-bit 4CPU3501+16−16(+43)10.5 − 11.5(+0−1=21)47.7%10.5 / 220.0%+29– Arasan 23.4 64-bit 4CPU3499+13−13(+41)8.5 − 11.5(+0−3=17)42.5%8.5 / 200.0%−4– Uralochka 3.38c 64-bit 4CPU3493+15−15(+35)10 − 10(+2−2=16)50.0%10.0 / 200.0%+35– Rebel 15.1a 64-bit 4CPU3490+16−16(+32)9 − 11(+0−2=18)45.0%9.0 / 200.1%+4– Arasan 23.5 64-bit 4CPU3488+15−15(+30)10.5 − 11.5(+1−2=19)47.7%10.5 / 220.2%+17– Igel 3.1.0 64-bit 4CPU3484+12−12(+26)9.5 − 10.5(+0−1=19)47.5%9.5 / 200.3%+13– Black Marlin 7.0 64-bit 4CPU3466+14−14(+8)8.5 − 11.5(+1−4=15)42.5%8.5 / 2018.7%−41– Houdini 6 64-bit 4CPU3456+7−7(−2)9 − 11(+1−3=16)45.0%9.0 / 2060.1%−31– Velvet 5.1.0 64-bit 4CPU3454+17−17(−4)16.5 − 13.5(+7−4=19)55.0%16.5 / 3063.2%+29– Marvin 6.1.0 64-bit 4CPU3448+15−15(−10)11.5 − 12.5(+0−1=23)47.9%11.5 / 2482.7%−20– Wasp 6.00 64-bit 4CPU3440+15−15(−18)12.5 − 7.5(+5−0=15)62.5%12.5 / 2096.4%+55– Nemorino 6.05 64-bit 4CPU3432+16−16(−26)10 − 10(+3−3=14)50.0%10.0 / 2099.2%−26– Booot 7.0 64-bit 4CPU3428+16−16(−30)10 − 10(+2−2=16)50.0%10.0 / 2099.7%−33– Velvet 4.1.0 64-bit 4CPU3423+15−15(−35)11 − 9(+4−2=14)55.0%11.0 / 20100.0%−4– Mantissa 3.7.2 64-bit 4CPU3381+15−15(−77)12 − 8(+4−0=16)60.0%12.0 / 20100.0%−17– Marvin 6.0.0 64-bit 4CPU3377+16−16(−81)11 − 9(+2−0=18)55.0%11.0 / 20100.0%−53– Expositor 2BR17 64-bit 4CPU3376+16−16(−82)12.5 − 7.5(+6−1=13)62.5%12.5 / 20100.0%0– Counter 5.0 64-bit 4CPU3373+18−18(−85)14.5 − 9.5(+7−2=15)60.4%14.5 / 24100.0%−17– Smallbrain 6.0 64-bit 4CPU3370+16−16(−88)13.5 − 10.5(+3−0=21)56.3%13.5 / 24100.0%−52– Stash 34.0 64-bit 4CPU3364+18−18(−94)16.5 − 7.5(+10−1=13)68.8%16.5 / 24100.0%+28– Drofa 4.0.0 64-bit 4CPU3318+20−20(−140)15 − 3(+12−0=6)83.3%15.0 / 18100.0%+102– Winter 1.0 64-bit 4CPU3306+18−18(−152)12.5 − 3.5(+9−0=7)78.1%12.5 / 16100.0%+40– Drofa 3.3.22 64-bit 4CPU3300+21−21(−158)13.5 − 6.5(+7−0=13)67.5%13.5 / 20100.0%−47
2025-04-15And click Start Clone.Tips: If there are bad sectors on the source disk, it is advised to uncheck Sector by sector clone box since it will clone every sector including bad sectors to the target disk. If the target disk is an SSD, check SSD Alignment to improve the speed of reading and writing as well as prolong the service life of SSD. If you are cloning a smaller disk to a larger disk, click Edit Partitions to make full use of disk capacity. Another way to transfer Windows 10/11 to new hard driveAs mentioned above, AOMEI Backup is also specialized backup and restore software. Therefore, you can transfer OS to a new drive by creating system image backup and then restoring system image to the new drive.💛 Extra tip:If you want to mount system/disk/partition backup image to restore individual files, you can go to Tools > Explore Image.Bonus: Limitations of cloning Windows 10/11 with ClonezillaThere are some limitations you should know about Clonezilla clone Windows 10/11. As you can see, the whole Clonezilla disk to disk clone process needs lots of steps, which is complicated and time-consuming. And you may be confused about the operation. If you want to use Clonezilla to clone Windows 10/11 to smaller SSD, shrinking the source partition is required to fit the destination partition. There is a chance that Clonezilla failed to clone when there is a bad sector on the drive. Windows not booting after clone due to different reasons, such as missing system reserved partition or EFI system partition, BIOS or UEFI boot mode dismatch, etc. Unable to mount Clonezilla image to restore a single file. It does not have a user-friendly GUI. If you prefer an easier way to clone Windows 10/11 to SSD/HDD instead of using Clonezilla, you have to turn to other cloning software for help. Fortunately, the above-mentioned Clonezilla alternative can help you clone Windows 10/11 to new hard drive in simple steps, even to a smaller SSD.FAQs about Clonezilla Windows 10/111. Does Clonezilla work on Windows 10/11?Clonezilla works on Windows 10/11, and you can use Clonezilla to clone Windows 10/11 and other systems to new hard drive or SSD, including the current installation, settings, apps, and personal data, etc.2. Does Clonezilla copy the operating system?As mentioned earlier, Clonezilla is free and open source software, which supports both disk imaging and cloning. For cloning a disk, it will clone everything and requires the target disk is larger than or equal to the source disk.3. Does Clonezilla work with UEFI?All Clonezilla live versions only support computers with legacy BIOS. If you want to use Clonezilla on Windows 10/11 UEFI, you could use Debian-based or Ubuntu-based AMD64 (X86-64) version of Clonezilla live.ConclusionNow you know how to clone Windows 10/11 via Clonezilla and AOMEI Backupper. Obviously, AOMEI Backupper is much easier and it’s the best Clonezilla alternative because it supports you to clone disk or partition in Windows 11/10/8/7/Vista/XP as you want.Besides, it can do more than what you think to
2025-04-23Is it workable for Rescuezilla to clone a hard drive to a smaller one? MiniTool will show you the feasibility and how to make Rescuezilla clone to smaller disk. What’s more, a Rescuezilla alternative with a friendly user interface and powerful features is offered for you.On This Page :About RescuezillaRescuezilla Clone to Smaller Disk: Is It Workable?How to Make Rescuezilla Clone to Smaller DiskRescuezilla Alternative – MiniTool ShadowMakerWrap Things upAbout RescuezillaYou may concern about “Rescuezilla clone to smaller disk”. Before introducing its feasibility, let’s have a simple understanding of this software.Rescuezilla is an easy-to-use open-source disk imaging and cloning software that supports Windows, Mac, and Linux. With it, you can make a backup of your hard drive & save the disk image to an external hard drive, and clone a hard disk to another one.This app is completely compatible with Clonezilla (used by tens of millions of users for disk cloning & imaging). That is, Rescuezilla is the Clonezilla GUI but it is more than a Clonezilla GUI, as its official website states.Rescuezilla Clone to Smaller Disk: Is It Workable?Speaking of Rescuezilla clone, this utility allows you to easily clone a hard drive to another hard disk. Usually, you choose to clone your HDD to an SSD to gain fast speed and optimal performance. It is easy to let Rescuezilla clone to larger drive.But if your SSD is smaller than the HDD, can Rescuezilla clone to smaller disk? Like other hard drive cloning software, this tool doesn’t support the operation and it requires the target drive to have an equal to or larger storage space than the source disk.If you persist in cloning a larger HDD to a smaller solid-state drive, a failure will happen due to insufficient space. To successfully clone to a smaller disk, you need to put in some additional effort.Tips: Rescuezilla has the same limitation as Clonezilla in cloning a disk to smaller one. If you prefer Clonezilla, refer to this guide - Can Clonezilla Clone to Smaller Drive? See How to Do.How to Make Rescuezilla Clone to Smaller Disk#1. Shrink PartitionSince Rescuezilla doesn’t yet automatically shrink partitions, it is a bit intractable for this operation but you can manually shrink the final partition on the source disk.Step 1: In Windows 11/10, press Win + X and choose Disk Management.Step 2: In the popup, right-click on the final partition and choose Shrink Volume.Step 3: Enter the amount of space to shrink and then click Shrink.Tips: To let Rescuezilla clone to larger drive, skip this shrinking operation. Then, follow the instructions in #2 and 3 for disk cloning.#2. Download Rescuezilla, Write It to USB, and Run Windows from USBStep 1: Visit the Rescuezilla Download page in a web browser and then get the rescuezilla-2.4.2-64bit.jammy.iso file.Step 2: Download Rufus online, run it in Windows 11/10, connect a USB flash drive to the PC, choose the downloaded ISO image file, and burn it to this USB drive.Step 3: Restart your computer to its BIOS menu by pressing a key
2025-04-21